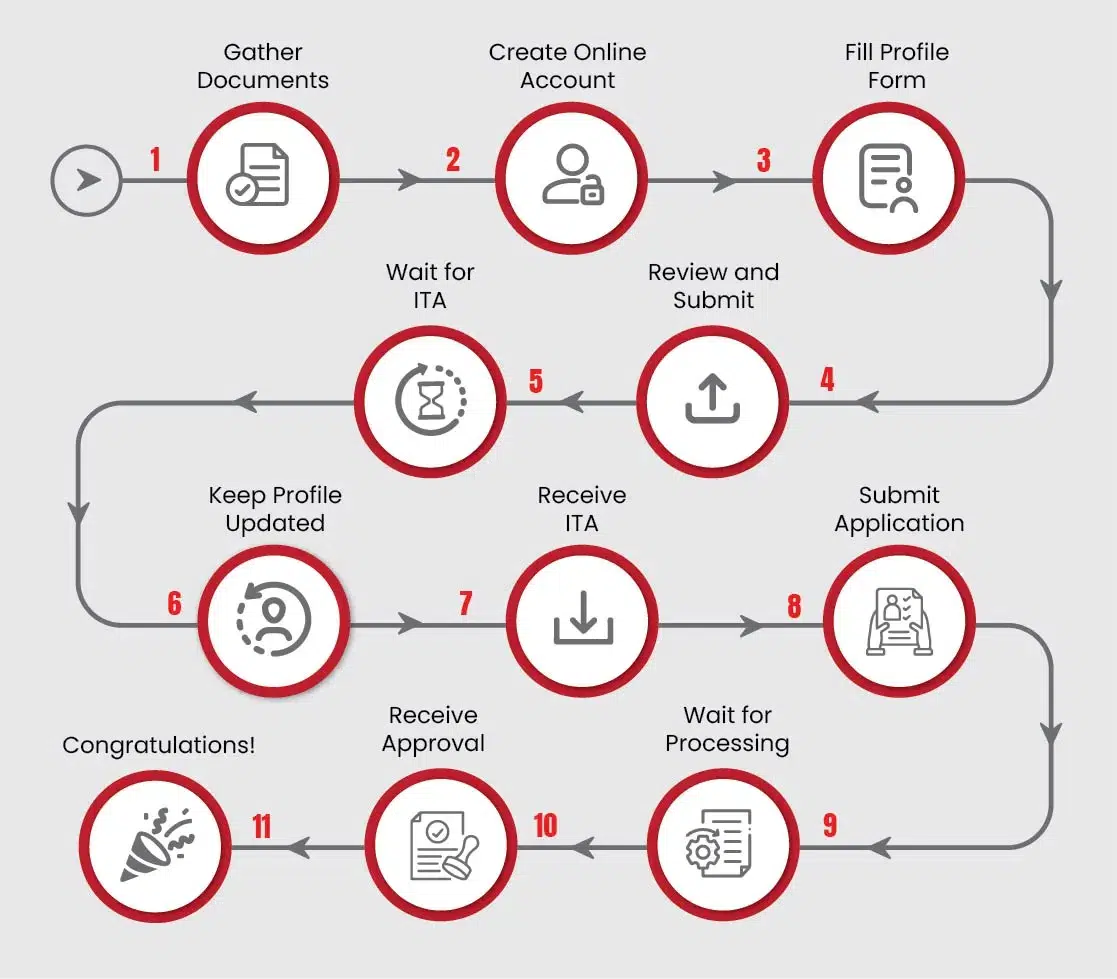
Looking to immigrate to Canada? The Express Entry system is your ticket to a smoother, faster application process. Here’s a step-by-step guide to creating your online Express Entry profile.
Things to Do Before Creating Express Entry Profile
Before starting your Canadian PR journey by creating an Express entry profile, it’s important to make sure that you are eligible for one of the three federal programs: Canadian Experience Class, Federal Skilled Worker Program and Federal Skilled Trades Program. Once you’re sure that you qualify for one of these programs, you can start the steps towards creating your profile.
Steps To Create an Express Entry Profile

Step 1: Gather Your Documents
First things first, gather all your documents. You’ll need your passport, language test results (like IELTS or CELPIP), and educational credential assessment (ECA).
Step 2: Create an Online Account
Next, head to the Immigration, Refugees, and Citizenship Canada (IRCC) website and create an online account. This account will be your platform for managing your Express Entry profile and application.
Step 3: Fill Out the Profile Form
After creating your account, start filling out the Express Entry profile form. Provide accurate and up-to-date information about your education, work experience, language skills, and other relevant details.
Step 4: Review and Submit
Make sure to double-check all the information you’ve entered. Accuracy is key to avoiding delays or complications in your application process. Once you’ve filled out the profile form, submit it online. You’ll receive a confirmation of receipt from IRCC.
Step 5: Wait for ITA
Now comes the waiting game. Your profile will enter the Express Entry pool along with other candidates. While waiting, keep an eye on your email and account notifications.
Step 6: Keep Your Profile Updated
Keep your profile updated. If your circumstances change, such as getting a new job or improving your language skills, make sure to update your profile accordingly.
Step 7: Receive an ITA
Wait for an Invitation to Apply (ITA). Candidates with the highest Comprehensive Ranking System (CRS) scores in general and those from certain categories will receive ITAs to apply for permanent residency.
Step 8: Submit Your Application
Once you receive an ITA, you’ll have a limited time to submit your application for permanent residency. Make sure to gather all required documents and submit them before the deadline.
Step 9: Wait for Processing
After submitting your application, wait for the processing to complete. IRCC will assess your application and may request additional information or documents if needed.
Step 10: Receive Approval
If your application is approved, you’ll receive a Confirmation of Permanent Residence (COPR) and a Permanent Resident Visa (if applicable).
Step 11: Congratulations!
Congratulations! You’re now a permanent resident of Canada. Welcome to your new home!
Frequently Asked Questions
Your Express Entry profile will only be valid for 12 months.In summary, creating an Express Entry profile is a straightforward process that involves gathering documents, filling out an online form, and waiting for an invitation to apply. By following these steps and staying organized, you can increase your chances of success in immigrating to Canada through the Express Entry system.
However, if you are feeling overwhelmed or confused by any particular step in the process, that’s normal too! Sometimes there are just too many documents to submit and too many rules to keep in mind. That’s where CanApprove can make a big difference. Thanks to our expertise regarding Canada immigration, we will be able to smooth out the process for you.
Simply contact one of our agents today for a free consultation, and we’ll help you with the process of setting up an Express Entry profile or any other immigration related query you may have.


